

Most anglers that are new to fly fishing have some fishing experience. People’s fishing journey starts with a regular rod and reel on either a pond or at the coast. As interest in angling increases, making the jump to a fly fishing setup is a natural progression. Although you are still pursuing the same species, the gear and mechanics of fly fishing are very different.
When I guide clients on fly fishing trips, before we start fly fishing, I casually ask them how much fishing experience they have. Most reply that they have a lot of fishing experience. Other then maybe reading water to see where fish live, I gently remind them that conventional fishing doesn’t translate well to fly fishing. Fly fishing technique and the basic gear required to pursue the sport is completely different.
That leads us to the important question: What is the best setup for a beginner. We’re going to break down everything you need to know about how to setup a fly fishing rod, reel, and other important fly fishing gear information, so that you can get on the water and start the fly fishing journey.
Table Of Contents
- What Is The Most Common Fly Fishing Rod Setup?
- How To Reel In Fish On A Fly Fishing Rod
- How To Spool A Fly Reel
- How To Rig Flies For Fly Fishing
- The Best Flies For Beginners
What Is The Most Common Fly Fishing Rod Setup?
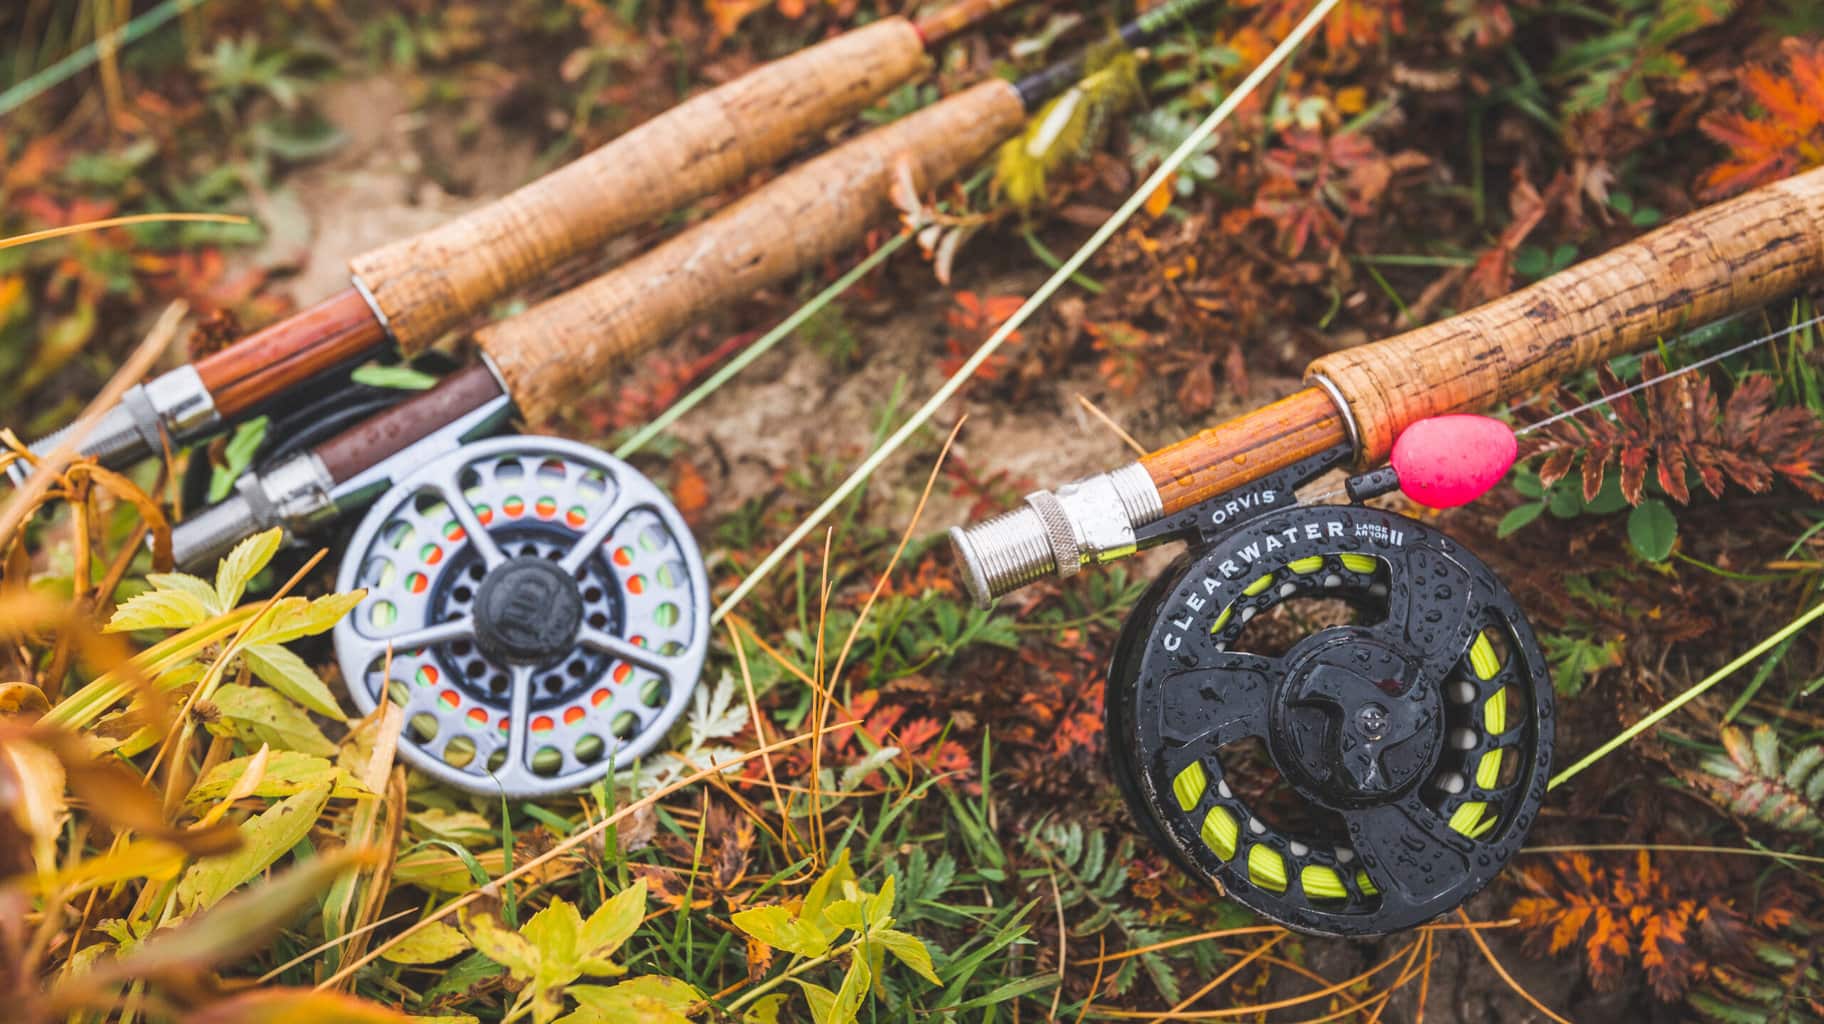
All fly fishing rod setups follow a common setup. In basic terms, you have a fly reel spooled with backing, a fly line, and a leader attached to a fly fishing rod appropriately sized to the fish you plan on catching. Now, what does that mean?
Let's cover how to select the correct fly rod for you.
The most common fly fishing setup depends on where you live and what type of fish you want to catch on a fly fishing rod. For most people in the lower United States, statistically you live near or probably already have experience catching largemouth bass or trout. The species, size of the fish, and size of the flies that you are planning to fish with influence what rod weight you will want to choose.
Fly fishing rods are rated on a weight system. This is the weight of the rod and fly line. The weight system goes from 2 weight all the way to 15 weight fly rods. The higher the number, the heavier the fly fishing rod and fly line. The heavier the fly fishing rod and fly line is, the bigger flies you can cast and the larger fish you can catch and land.
A 2 to 3 weight fly fishing rod is ideal for small panfish poppers, dry flies, and nymphing. This size is great for panfish and catching trout. While you can absolutely catch larger trout on a 2 or 3 weight fly rod, it will make landing one seem like you're reeling in a massive log. The 3 weight fly rod is a bit more practical than a 2 weight, but that is up to your personal preferences. I would recommend testing a 2 weight fly rod before absolutely committing to the purchase.
A 4 to 6 weight fly fishing rod is ideal for small bass poppers, dry flies, nymph flies, and streamers. This size is great for panfish, bass, and catching trout. These are the most common fly rods for the vast majority of freshwater fly anglers.
A 7 to 9 weight fly fishing rod is ideal for streamers, large bass poppers, and saltwater flies. This size is great for steelhead, salmon, bass, and inshore saltwater fly fishing.
A 10 to 15 weight fly fishing rod is ideal for streamers and offshore Flies saltwater flies. This size is great for tarpon and offshore saltwater fly fishing.
When I use to work in a fly shop in the Idaho, we tried to steer new fly-fishing enthusiast towards a 6 weight. For most anglers, a 6 weight fly fishing rod combo is a great option as a first fly fishing rod. The 6 weight straddles a fine line between being well suited for trout, but is also great for throwing small and medium sized bass poppers to warm water species as well.
Whether trout fishing on large western rivers or bass fishing on southern ponds, a 6 weight is great all-around fly fishing rod. Wind is often a factor on the Western trout stream and the added weight of a 6 weight line will make your day casting to rising trout much easier. In addition, a 6 weight fly fishing rod can be fished using larger nymphs with an indicator, or throwing large foam flies to the banks for rising trout. If the occasion allows it, I will even have clients throw a 6 weight with small streamers.
Able to cast slightly larger flies than a 5 weight fly fishing rod, the 6 weight fly rod combo is ideal for casting small bass poppers and streamers to smaller freshwater fish. Small crayfish patters, deer hair poppers, and small terrestrial flies make for a fun fly fishing experience in creeks and ponds that can be found throughout the United States. The 6 weight is so versatile that it can even be used to catch carp!
What Is The Best Length Fly Fishing Rod?
There are many different lengths of fly rods, each with its own pros and cons. Typically, a 4-piece 9-foot fly fishing rod is the standard length that most anglers choose and the length we recommend you start with.
A 9-foot fly rod provides the fly fisher an ample opportunity to make delicate presentations with dry flies or fish a heavier nymph rig setup with an indicator. In addition, the longer rod makes mending fly line much easier and helps you put distance between you and the fish. Mending is the act of picking up your line up off the water, so that other 'micro' currents don’t drag your fly unnaturally through the water. The longer the rod, the more leverage an angler has over the line.
When you're shopping around for a good fly rod you may encounter rods that are 9-foot 6-inch. These 6-inch incrediments are great in-between sizes and are just there to provide extra reach. In addition to our recommendation of a flat 9-foot fly rod, the 9-foot 6-inch fly rod is also a great option. Choosing between the two simply depends on the size of water you are fishing. Bigger water demands a longer fly rod.
Fly rod lengths range from 6’6’ all the way to 12 feet in length. Shorter rods are ideal if you are fishing small spring creeks or backcountry streams where there isn’t much room to make an overhead fly cast. The shorter fly rod length can be an advantage when helping to keep your flies out of bushes and trees.
Fly rods over 9 feet in the 10-12 foot range are, also, commonly used for "European" or "Euro" nymphing. European nymphing is the art of using heavily weighted flies without a strike indicator. This is short-line nymphing. Rarely, anglers have more than a few feet of line out of the tip of your fly rod. This type of fishing was born out of competitive fly fishing. The goal is to get the flies deep very fast and into the strike zone. The longer fly rod allows the angler to be further from the fish and gives you better line control when short line nymphing.
How Much Should I Spend On A Fly Rod Setup?
Beginner fly fishermen definitely do not need to spend a fortune on fly rods, reels, line, and flies to get started. In fact, I spent $50 on a clearance fly rod setup and it did perfectly fine for nearly 5 years. However, there is a very noticable difference in your casting ability, accuracy, and comfort once you spend more than $100 on a rod.
Fly rods between $0 and $100 can be hit or miss. They will absolutely get the job done and great for a few years, but don't be suprised if your tip break prematurely or the craftsmenship is poor. Fly rods in this range also don't offer great warranties, so be sure to research warranties between brands.
Fly rods between $100 and $250 are our best recommendation. These fly rods are not cheaply constructed and not overly expensive, the best value for quality and price. Most fly rods in this range offer great warranties, so be sure to research between brands before choosing.
Fly rods over $300 are great value rods that will last you a lifetime. You will absolutely see quality in everything these premium rods have to offer, but deminishing returns comes into play. The performance between a $200 fly rod and a $800 will be noticable in it's smoothiness and effortless ability to cast, but not worth the $600 extra you had to pay.
Fly fishing rods, reels, and line for large predatory fish such as bass, pike, musky, carp, and saltwater fish will be more expensive and are worth spending a little bit more than the budget scale shown above.
What would I do? My honest take.
If I were starting fresh and had to purchase a fly rod, reel, and line, I would spend less than $350 on the entire fly fishing setup. For your reference, I fly fish for trout, bass, and panfish most of my time. I'd spend between $120 and $200 for the fly rod, a 5-weight so I can cast anything from dry flies to small poppers.
The fly reel I would spend a maximum of $60 as I rarely have fish test my drag system. The remaining $40 will be spent on a weight-forward fly line that gets the job done, but isn't out to impress anyone. If I have a little extra money for flies and leaders I would buy a 12-pack of the most effective flies and a 5x tapered leader with a spool of 5x tippet. From there you can grab hemostats from a bait-and-tackle shop and nail clippers for less than $3 at a convenience store.

In all honesty, I would start with the NXT Black Label kit by Temple Fork Outfitters (TFO) in the 9-foot 5 weight size. I currently fish one of their fly rods and have for nearly a decade. TFO has one of, if not the best, lifetime warranty available in the industry. Plus, this fly fishing kit fits perfectly within the $350 budget and comes with everything but the flies. The fly reel is fully loaded with backing, a weight forward floating line, and fly leader so the only other items you would need are basic fishing tools.
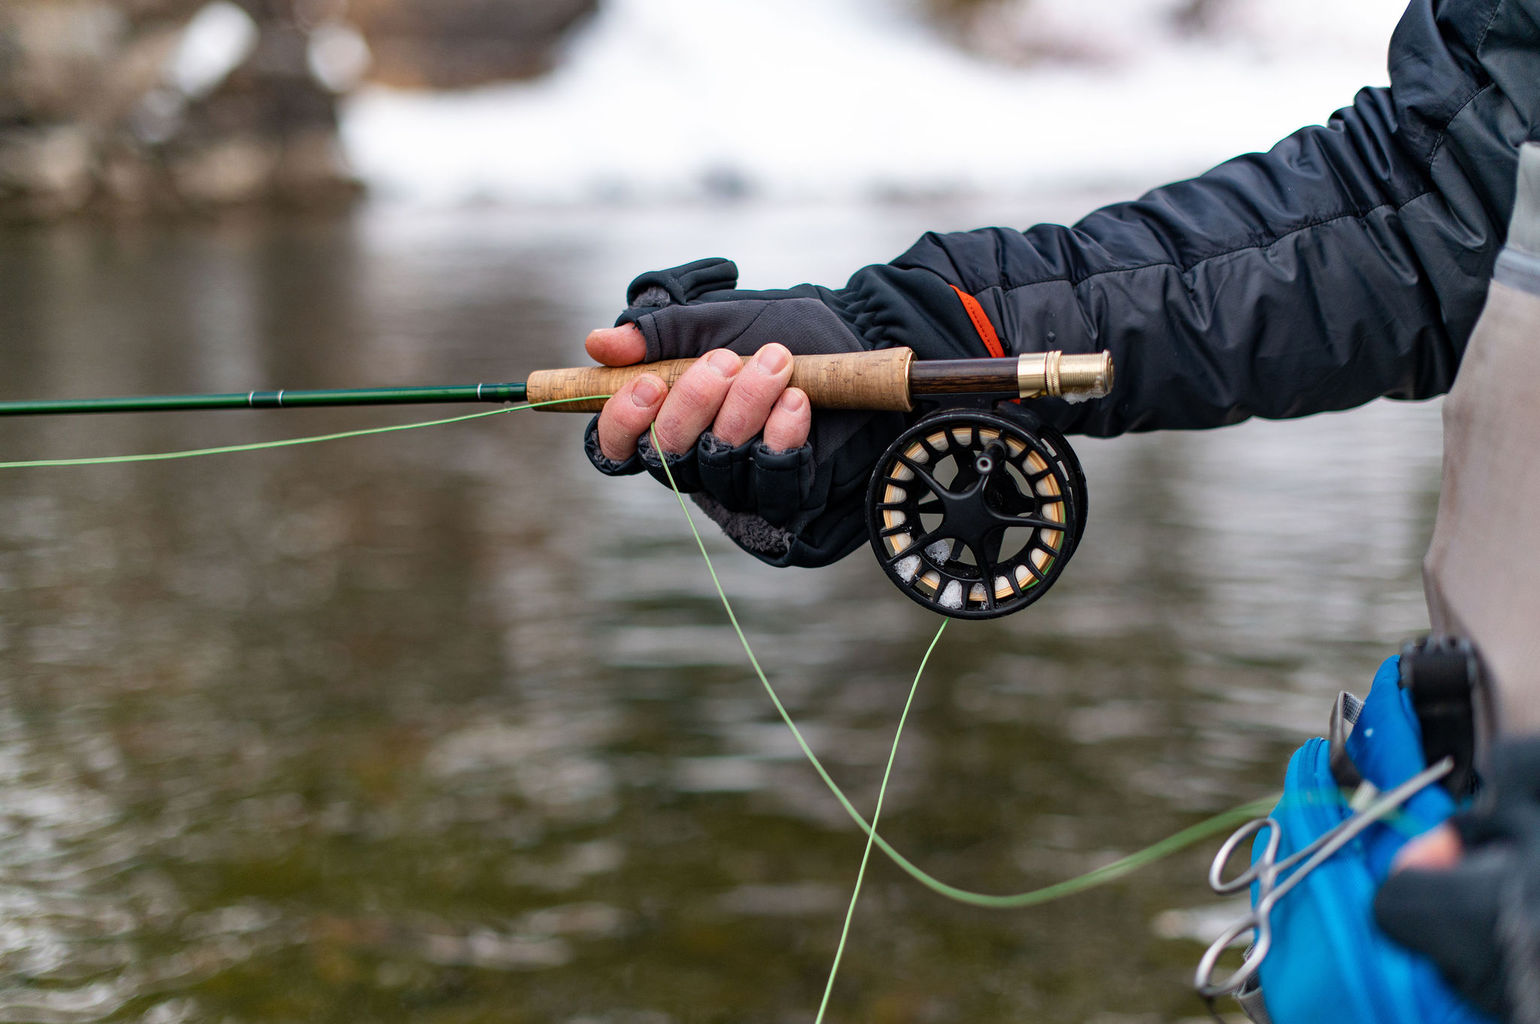
How To Assemble A Fly Rod
Assembling a 4 piece fly rod is straightforward. On each section, there are alignment dots. Put each section of the rod together matching the alignment dots to each other. While holding the rod by it's grip, look down the rod and make sure that all the guides are aligned correctly with the reel.
If you're fly rod does not have alignment dots, simply put together the rod at each section and gently spin it so that the rod guides line up straight with the reel.
To correctly put a fly fishing reel on a fly rod, the handle of the reel should always be facing your non-dominant hand. For example, if you are right-handed the reel handle will be facing left so that your left hand can grip it while you hold the rod in your right-hand. All of your casting will be done with your right hand as you hold the fly line in your left hand.
After you place the reel on the fly rod, pull out a foot or so of the fly line. In most reels, there is a bridge across from one side of the reel to the other, the fly line should pass under this 'bridge' and not over. Doing this will give you easier access to your fly line and avoids tangling or slipage during a fight.
To feed fly line up through your fly rod guides, create a loop with your fly line. Use this loop to feed through each of your rod guides until you're all the way through the final guide. This loop will prevent your fly line from falling back through all the rod guides if you let go. Please refer to the image at the top as an example.

How To Reel In Fish On A Fly Fishing Rod
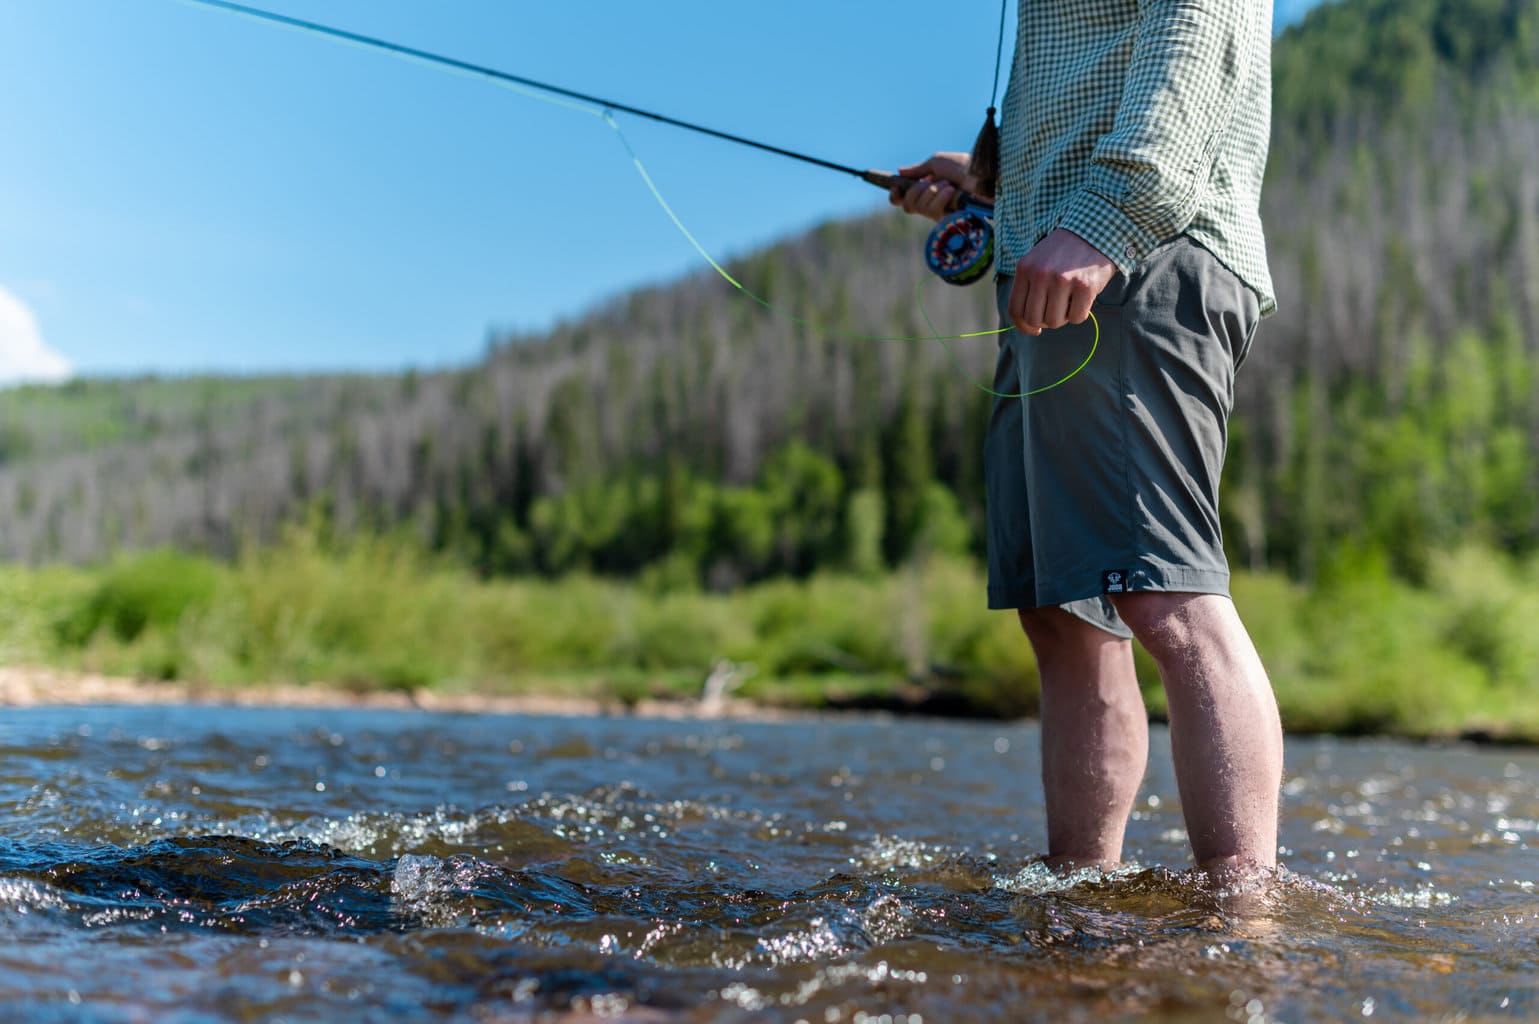
You have two options for reeling in a fish on a fly rod. You can either strip the fish in or use the fly reel to reel it in. In many cases, you may end up using both methods. However, for small fish, it is much easier to strip in the fish by pulling the line back towards you. Using a fly reels drag system doesn't come into play until you are catching a large fish.
We don’t often use the reel to land the fish. I discourage clients from trying to put trout and small bass on the reel when fighting fish. For many beginners, trying to put fish on the reel to reel them in is where many fish are lost. This is because beginners will drop the rod tip of the fly rod and create slack in the line when fighting fish. This is all that is needed to free the hook from the fish's mouth.
When fishing for smaller freshwater fish like bass and trout, we use our fingers as an ad hoc drag system to fight fish. Therefore, I usually advise beginner fly fishermen to buy a medium priced machined reel. A click-in-paw drag system is very effective. Click and paw drag systems are simple, low maintenance, and cost effective. They consist of a tooth and gear setup that keeps the fly line from overrunning the spool of the fly reel. It is unusual when fishing with a 6 weight rod for bass or trout that we will ever actually use the drag system.
How To Fight Larger Fish
If you are chasing larger gamefish such as larger bass or inshore saltwater species, you will want to invest in a fly reel that has a disc drag. In addition, you'll need a fully sealed drag system, especially in saltwater. Having a fly fishing reel with these qualities gives you a fighting chance when the fish starts darting away and you can't keep up. Your reel's drag system will take up the slack and tire the fish out before you run out of line.
Cork v.s. Synthetic Drag Systems
Disc drag reels are created with a set of discs that sit on top of each other and when compressed they create drag that is needed to slow down larger game fish. Disc drag fly reels come in both cork and synthetic disc drag reels. My recommendation is to stay away from cork drag systems. They work the best, but only if you meticulously maintain them. Rulon synthetic disc drags are low maintenance and just as effective.
Having a sealed drag is especially important because this keeps debris and river grim from entering the drag system and fowling it up. This is crucial in saltwater fishing. If you accidentally dunk your reel in the salt water and it is not sealed, the corrosive nature of saltwater will ruin the gears in your fly reel.

How To Spool A Fly Reel
Setting up a fly reel is simple and straightforward. That being said, I would always recommend going into your local fly shop and receiving some guidance on how to do it. Typically, most fly shops will set your reel up for free. There are several components to a reel: the reel, the fly line, and the backing.
How Much Backing Line Should I Put On My Reel?
Fly line backing serves several purposes and it is the first material that will be added to a fly reel. Backing is a braided nylon line that acts as an emergency line. If you happen to hook into a huge fish that makes a long drag inducing run, then the backing is there to make sure that a fish doesn't run all the fly line off the reel.
Typically, you will add about 50 yards of backing to your fly reel, but this depends on the weight size of your reel. Backing is also important because it acts as a reel filler. The fuller our reel is with line the fewer times we have to turn the reel to pick line up.
Here's a good reference for how much backing to add to your fly reel.
A 1 to 2 weight fly reel should have up to 25 yards of backing.
A 3 to 5 weight fly reel should have 25 to 50 yards of backing.
A 5 to 7 weight fly reel should have 50 to 100 yards.
A 7 to 9 weight reel should have 100 to 200 yards
It is important to note that you don't want so much backing on the reel that your fly line is scrapping the reel body. There should be room between the fly line and the top of the reel body to prevent tangling and your reel from getting clogged.
Here's fly fishing backing that I would use from RIO.
Arbor Knot Connection To The Fly Reel
The first step to adding backing to the reel is tie an Arbor Knot around the spool. Make sure that the backing is going out the correct side of the fly reel. If not you will have to take the backing off the reel and re-do it. Make sure to use your finger to guide the backing back and forth so that it is evenly distributed across the face of the reel. The next step is to connect the fly line to backing.
How to Setup Your Fly Reel With The Right Fly Line?
Choosing the right fly line with the correct fly line taper is critical to catching fish and being able to make proper cast with the right presentation. There are different types of fly lines for different situations. If you are looking for a good all-around fly line, then choose a weight forward fly line that matches the weight of your fly rod. If you are new to fly fishing and need a little help with casting, then choose a weight forward fly line that is one size heavier than your fly rod. Choose a floating fly line. Floating line is the most versatile all around line that covers general applications for streamers, nymphs, and dry flies. Orvis and Scientific Anglers both make excellent lines.
When making an overhead fly cast, we are using the plastic weighted line of the fly line to load or bend the rod. Heavier fly lines help beginner fly fishers load and cast the rod easier. I recommend choosing line that is in the mid-range in terms of price. If you have the budget, get the best line money can buy. They float better and the line does not get water logged and sink.
Fly lines cannot be changed easily. If you want to use other types of lines for different situations, then you will need to buy spare spools for the extra fly line. These spools can be switched back and forth on the frame of the fly reel, allowing anglers to adapt to different angling situations. Fly lines that are specific for throwing streamers, nymphing, and sinking fly line for lake fishing, are all important additions that can be added to anglers arsenal as the angling journey expands to tackle new challenges.
Attaching The Fly Line to Your Backing
Once you have selected the proper line that matches the weight of the rod or the type of fishing you are doing, then you need to attach the fly line to the backing. Make sure that when you remove the fly line from the package that you do not take it off the cardboard spool. There should be a small tag on the end of the line that says “This end to Backing”, or something similar. This is important, because fly lines are tapered, they consist of a skinny portion of the line called the running line. The running line attaches to the backing and will be labeled accordingly. The running line is the majority of the fly line. The wider tapered part of the fly line is called the “belly”. This is the part that will be attached to leader which is what the flies are tied onto.
Using The Albright Knot
These days, fly lines are fully sealed. This means that the end are sealed, this keeps water from seeping into the braided portion of the fly line. For this purpose we never want to cut into a fly line. The nail knot is often recommended for attaching the backing to the fly line. This is a very difficulty knot to tie and often times, you need a special tool. I recommend an Albright knot. It is easy to tie. In addition, they create a very smooth backing to leader transition. This is important because if you ever get a fish that takes you into the backing, then you don’t want the knot catching on the guides of the fly rod. Hit all connecting knots with a drop of glue or UV .
Take a pencil and insert into the hole in the middle of the cardboard fly line holder. Have someone hold the pencil so the spool spins freely. I usually hold the pencil in between both feet with my toes if I cannot find someone to help me. Wind the lineup, and make sure tension is created with your fingers as you guide the fly line onto the reel. Move your fingers back and forth to evenly distribute the fly line across the face of the reel.

How To Rig Flies For Fly Fishing
Adding a leader and flies to your fly fishing rod and reel combo is the last step of the process. The fly leader is the clear piece of line that we add to the fly line and eventually tie our flies to. The leader is also tapered.
The heaviest part of the leader, the butt section, is going to be attached to the end of your plastic colored fly line. Most fly lines and fly leaders have a loop on the end. Using a loop-to-loop connection, the two loops form a handshake knot. This is the easiest way to attach a leader to a fly line. In addition, it makes it very to switch leaders on the water, without having to cut either your fly line or leader.
If your leader or fly line does not have a loop at the end, you can use a Nail Knot to connect them.
Fly leaders are typically 7.5 ft to 9 ft long. They are denoted by an "X" system. The lower the number the higher lbs. test the leader is. A 0X leaders mean that the end of the leader that you are going to tie your fly to is around 15 lbs in strength. As the number increases all the way to 8X, the lbs and diameter of the leader get smaller and lighter.
Tippet
8X
7x
6x
5x
4x
3x
2x
1x
0x
Diameter
.003"
.004"
.005"
.006"
.007"
.008"
.009"
.010"
.011"
Lbs
1.75
2.5
3.5
4.75
6
8.5
11.5
13.5
15.5
The diameter of the leader is important. You have to match the size of the fly with corresponding tippet size. You cannot tie a size 16 dry fly to 0X tippet. For most trout fishing situations, you will use tippet between 3X to 4X tippet. For bass fishing, you will cast heavier flies which require heavier tippet to turn the flies over on the forward cast. Fly fishing for bass and inshore saltwater species generally require 0X to 3X.
What Size Tippet And Fly Leader To Use?
Knowing what size tippet to pair with your flies is just as important as your fly selection. The thickness of your tippet can make or, quite literally, break the quality of your presentation.
Thicker tippet sizes (0X – 3X) are stiff enough to roll over and cast heavier flies with greater accuracy. Not only that, but bigger flies usually mean larger fish so these thicker tippets will provide higher poundage to avoid losing your personal best catch to a weak knot. Use 3X or thicker tippet for any flies as large or bigger than a size #8. This includes streamers, poppers, and bass bugs or casting to large fish.
I would not recommend using these large sizes for tiny flies simply because their thickness would prevent a natural drift. For example, casting tiny size #20 tricos on a slow-moving pool with a 2X tippet would not be able to dead-drift naturally were a 6X or 7X would shine.
Mid-Range tippets (4X – 5X) are ideal for small streamers and nymphing rigs. These sizes are not ideal for casting big flies and are best suited for flies smaller than #8. It’s not that 4X or 5X is too light of poundage to handle big fish, it’s simply that they may be a little too flimsy for curling heavy streamers easily.
Thinner tippet sizes (6X – 7X) are perfect for small flies and delicate casts. When casting to rising trout requires a soft presentation to avoid spooking them, use these thinner sizes. The fineness of these tippets allows your rigs to drift naturally with the microcurrents and float gently onto the water without disrupting any active feeding.
- 0X – 3X Tippet: Ideal for size #8 and larger flies to catch bigger fish.
- 4X – 5X Tippet: Ideal for smaller streamers and nymphing rigs. Very versatile for size #8 to size #20 flies.
- 6X – 7X Tippet: Ideal for small flies and delicate casts. Recommended for size #12 to size #22 or smaller.
Shop quality tippets and leaders here.

How To Tie A Fly On Your Fly Line
Attaching the fly patterns to your leader is the last step in completing your basic setup. What are the best knots to use for attaching these flies? There are a variety of different fishing knots that you could use to accomplish the goal of tying your fly on the leader. There is no right or wrong answer. It's really about what you prefer and have confidence in. When I am guiding, I typically use the same few knots over and over. I use knots that have good holding strength, are easy to tie, and are quick to tie. I use knots that meet these criteria, because the more time an angler or client spends with flies in the water, the higher chance we have of catching fish. You cannot catch fish if your flies are in the boat, or in the air.
4 Fishing Knots Every Angler Should Know
It is not necessary to have a huge inventory of knot knowledge. Knots can be practiced in the comfort of your living room. The list of knots below will get you through most fishing situations.
The Improved Clinch Knot is used for tying flies to the end of the tippet. Particularly, this is used to tie your first fly or point fly to the end of the fishing line.

A Non-Slip Loop Knot is used to add smaller nymphs, dry flies and streamers to fly line. The advantage of a non-slip loop is that the small loop in the leader allows the fly to move freely in the water. This is critical when creating a lifelike presentation and allows the fly to look more like a life-like insect.

The Overhand Double Surgeons Knot is ideal for quickly tying the tippet to the leader. This knot is strong, effective, and can be done lightning fast. I use this knot when time is of the essence and I don't need a tag end for a fly.

The Barrel Knot is also used to tie the tippet to the fly leader. However, this knot is best used when you need a tag end and droppers to add a fly to your fishing setup. The tag ends that are created with a barrel knot are at a 90-degree angle to the leader. These are ideal for adding an additional fly in a multi-fly setup or tandem rig.
Recommended Reading: 8 Fly Fishing Knots For Beginners
How To Setup A Dry Fly Fishing Rig
A basic dry fly fishing is simple to setup with only one dry fly on a long 9-foot fly leader. Start with a 5x leader for dry flies larger than a size #18. If you're looking to fish flies smaller than a size #18, attach a 24-inch section of 6x tippet to your 5x leader with a Surgeon's Knot.
If you want to fish more than one dry fly or flies, in general, at the same time add an adjustable dry-dropper. I like to use a barrel knot when I am fishing dry flies in a multiple fly set up. In early spring and mid summer I like to throw a two and sometime three dry fly rig on riffles. The barrel knot comes into play when I am attaching tippet to my leader. Leaving a 3-4" tag end, the knot allows you to add a dry fly onto the tag end and give fish a different presentation.
My rig looks like this: 7.5 ft 3x or 4x leader using a barrel knot to add 18-24" of 4X tippet to the end of the leader. At the juncture of the barrel knot there will be two tag ends. Trim one tag end and leave the other tag end at 3-4" in length. I tie an elk hair caddis on the remaining tag end. Then, at the end of tippet I added, I will attach a large foam fly using an improved clinch knot. A chubby Chernobyl or some variation there of, is usually a solid choice. I like this setup because it keeps your two dry flies separated and gives the fish a different look than most traditional two fly offerings tied off the bend of the hook.
How To Setup A Nymphing Rig
The best way to set up a nymphing rig for beginners is to take your current fly leader, or a 3x to 5x leader, and attach a weighted nymph fly to the end using a Davy Knot or Clinch Knot. Select a nymph fly with enough weight to have it dive deep through the current, such as a tungsten beaded nymph. Place lead-free split-shot or additional flies to your nymphing rig to add more weight.
You can choose to use a tight-line method, an effective short-line nymphing technique, or place a strike indicator on your leader. Strike indicators, a type of fishing bobber in fly fishing, are great for presenting nymph flies from a distance to avoid spooking fish or entering the water in unsafe conditions.
Usually, you want to position your strike indicator 1.5 times the depth of the water above your fly. The faster the water, the higher up your strike indicator should be. For example, if the water is 3-feet deep, place your indicator 4.5-feet (1.5 times the depth) above the fly on your leader. Feel free to adjust the indicator by moving it up or down the leader as you fish different areas on the stream.
If the nymph fly is constantly snagging on the bottom, move the strike indicator down the leader to make the length that is in the water shorter.
If the nymph fly is getting swept downstream far too quickly, move the strike indicator up the leader to make the length that is in the water longer. Ideally, nymph flies should be close to the bottom. This is where the trout will be feeding.
That's it!
To fish two or more nymph flies at once take a 9-foot 3x tapered fly leader and add your first nymph to the end. Next, clip a 24-inch section of 4x or 5x tippet and tie it to the bend or eye-of-the-hook of the first nymph. Finally, add the second nymph to the new section of tippet.
What would I do? How I fish two or more nymph flies.
When I fish two nymph flies, my leader of choice is a 7.5 ft 3X leader, but you can easily use a 9-foot leader as well. At the end of the leader, I add 18-24" 3x flurocarbon tippet. The tippet is joined to the leader using a double overhand surgeon's knot instead of the barrel knot.
The overhand surgeon's knot is fast and effective. Trim both tag ends. This knot juncture is important, because the knot allows us to place split shot above the knot without the split shot sliding down to the leader to our point fly. At the end of the 3X flurocarbon tippet, I tie my first fly. In most situations where I fish, this calls for a Pat's Rubber leg. Pat's Rubber legs are heavy, effective, and a great all around fly pattern. In my experience they tend to catch bigger fish.
Attaching the first fly, or point fly, to leader is achieved with an improved clinch knot. Take 18-24" of 4x tippet and tie an improved clinch knot to the bend of the first fly. You can also tie this additional piece of tippet to the eye of the fly as well for a different presentation. The option of tying the tippet to the eye or the bend of the hook is your preference. At the end of this additional tippet tie a non-slip loop knot and add a small pheasant tail. The size can vary depending on what hatches and aquatic life are present. A good all around fly is a flashback pheasant tail in size #16.
The last step is to add a strike indicator. There are many different types of indicators that can be used. The most user friendly and low maintenance strike indicators are Thingamabobbers. They are added to the leader at a height of 1.5x the depth of water that you are fishing. Again, if you are fishing water that is 3 feet deep, then set your indicator at 4.5 feet. They are added to the leader by looping your leader through the small eye of the indicator. Newer models can be screwed onto the leader with the airlock caps. Other options are: yarn indicators, stick on indicators, or pegged foam indicators, even balloons.
The Best Flies For Beginners
Having a few flies in your fly boxes for different fly fishing situations is a great starting point to start fishing. An assortment of wet flies, dry flies, nymphs, and streamers is a good beginner setup. The best flies for a beginner angler, are flies that are impressionistic. Impressionistic flies, cover general insect categories and are great for many different fishing scenarios and insect hatches. Excellent impressionistic flies are flies such as Elk Hair Caddis, Parachutes Adams, Hares Ears, and Pheasant Tails. If you have these flies in different sizes and colors, or you carry permanent markers, then you can adjust the size and color to any different hatch on the river.
There are thousands of different flies available to beginners, but which are going to perform the best regardless of where you go? Over the last 6 years, we've compiled a list of trout flies to answer that exact question, "what are the best flies for beginners?" In no particular order, here are the best 19 trout flies for fly fishing that catch fish anywhere.

1. Stimulator
Size #10 - #14
Stimulators imitate stoneflies and even other large flying insects such as grasshoppers and large caddis species. Recommended for dry-dropper rigs. Cast this fly into and along the seam lines that bubbles are commonly funneled into. For more delicate casts, cast a few feet above the water and let the line drift down slowly onto the water.

2. BWO Parachute
Size #16 - #20
One of the largest hatches is the Blue Winged Olive hatch, which is most common during the warmest parts of the day during the spring, late summer, and fall. Use a light tippet / leader (5x - 7x) for a softer presentation. If fish are spooking to the presence of your line / fly in the water, add another foot or two of tippet. This will help create a softer landing on the surface and put more distance between your colored fly line and the fish. Use a long leader and 24" - 36" of 6x tippet to get a softer presentation. This is great for tail-end of pools and long flat runs. Lead rising trout several feet.

3. Adams Parachute
Size #12 - #18
Imitates a large variety of mayfly hatches throughout the season. Also, great for prospecting and as the dry fly in a dry-dropper rig. Fish this in a multi-fly rig with an emerger trailing below or with a midge dry fly or caddis imitation.

4. Royal Wulff
Size #12 - #14
Attractor flies like these are a great choice for small streams and searching new water. Imitates large mayflies and other insects that fall in from above. Great for dry-dropper rigs tied in 12-24 inches below a dry fly of your choice. Use a section of 5x or 6x tippet attached by the eye of the hook rather than the bend of the hook.

Buy 40 of our favorite Trout Flies.
Click the button below to shop all 40 flies we recommend for newcomers and anglers restocking. We hand-selected our best performers from this article and assembled them into one assortment.

5. BWO Foam Emerger
Size #18 - #20
This blue-winged olive emerger pattern features a foam post to float this fly within the surface film. Trail this below a dry fly or fish by itself with a light leader. The majority of the time we pair dry flies with emerger patterns such as this trailing below by a 12-inch section of 5x tippet.

6. Neversink Caddis
Size #12 - #16
Fish late in the afternoon for best results, or prospect seams and runs. Try doubling up with a 2-dry fly tandem rig to fish two hatches at once. Imitates an adult caddis.
To make a 2-dry fly tandem rig, space this with another dry fly of your choice 12" to 18" apart by tying a new section of 5x or 6x tippet to the eye of the hook or from the bend. Target bubbly seams along rocks, roots, undercut banks, or anywhere else with great cover for ambush strikes.

7. Micro Chubby Chernobyl
Size #10 - #16
Imitate stoneflies, caddis, grasshoppers, crickets, and more. Good for faster water and dry-dropper rigs. Excellent in small mountain streams for wild trout.
To make a dry-dropper rig, add a section of 5x or 6x tippet by tying it to the eye of the hook or from the bend. The length of the added tippet section should be about 1.5 times the depth of the water; this does not need to be exact. Then add a second fly to that new section with another Clinch Knot. Choose a light weighted fly that won't drag the Micro Chubby Chernobyl below the surface. Typically, midges and small nymphs work best.

8. Holo Midge
Size #16 - #20
A simple midge pattern that serves as a midge larva imitation. Tie this into your tandem rigs above a heavier nymph. Great for dry-dropper rigs tied in 12-24 inches below a dry fly of your choice. Use a section of 5x or 6x tippet attached by the eye of the hook rather than the bend of the hook.

9. Tungsten Rainbow Warrior
Size #16 - #20
Rainbow Warriors don't imitate any specific insect in particular but turn heads because of its flash. Few hatches are as important as the midge hatch. These tiny insects hatch every day no matter the weather. Use a 5x - 7x tippet and search out slow water and slack pools.

10. Tungsten San Juan Worm
Size #12
Worms should be your first thought after a rainfall, snowmelt, or during a damn release on tailwaters. Tie this lightweight worm fly in a multiple fly rig and fish below obstructions such as boulders, fallen trees, roots, etc

11. Soft Hackle Hare's Ear
Size #14 - #16
Soft Hackle flies are widely underused despite their effectiveness in imitating emergers and hatching insects from caddis to mayflies. Best used in tandem rigs as the upper-most fly to be dead drifted or swung across currents. Space 8 to 12-inches apart and using a non-slip loop is encouraged for move natural movement in the water.

12. Jigged Frenchie
Size #14 - #16
Tie this attractor nymph pattern in with your favorite nymphs. Ideal in faster moving water. Imitates a variety of aquatic larva and nymphs.
To make a multi-nymphing rig, space this with another nymph of your choice 12" to 18" apart by tying 4x or 5x tippet to the eye of the hook or from the bend.

13. Dirty Hipster Jig
Size #14 - #16
Dirty Hipster Jigs are ideal for fast water and deep runs. Fish these 12-inches below another fly of your choice. It's an effective stonefly and mayfly imitation. Pair with heavier nymphs to target deep pools or use a small indicator (or tight-line style) to tumble this flashy attractor fly near the bottom.

14. Beaded Pink Egg
Size #10 - #12
Great after a rainfall, snowmelt, or during a damn release. Use in a multiple fly rig and fish below obstructions such as boulders, fallen trees, roots, etc. Eggs are an abundant food source in major streams and a highly productive pattern to fish.

15. Pink Tag Jig
Size #14 - #16
A mayfly and stonefly nymph imitation. Tie in a smaller nymph 12" above with 5x tippet and get these near the bottom. Fish in a tandem rig with 2 or even 3 flies (based on local regulations). While insect activity will increase moving into the spring and summer, the overwhelming majority of a trout's diet is consumed sub-surface.


16. Beaded Scud
Size #14 - #16
Scuds are freshwater crustaceans that provide a stable food source year-round. Fish low and target deep water. Best used under an indicator or in multi-fly nymphing rigs.

17. Conehead Muddler Minnow
Size #8 - #10
A great baitfish or sculpin pattern that gets down fast in heavy water. Increase the weight of your leader or tippet to 3x - 1x.

18. Hare's Ear Nymph
Size #12 - #16
An extremely versatile nymph for nearly all conditions. Imitates stonefly and mayfly nymphs. Great for tandem rigs, aka multi-fly nymphing rigs.


19. Beaded Woolly Bugger
Size #8
Woolly Bugger streamers imitate leeches and baitfish. It can be dead-drifted, swung, and stripped anywhere you go. Trout will hit these streamers hard so be sure to use at least 3x tippet.
Heavier tippet will also allow you to make more accurate casts and cut through wind. Cast downstream at an angle so that your line is taught while varying your stripping speed through deeper pools and bubbly seam-lines. Make it flee away from fish.
Besides our own products listed, we were not compensated by other companies to review their products nor do they have any knowledge that we are writing this guide. However, we do receive an affiliate fee from certain online retailers (like Amazon) when readers click through the link and finalize a purchase. This policy helps support the operation of our fly fishing blog and keeps access to all our content free to the public.